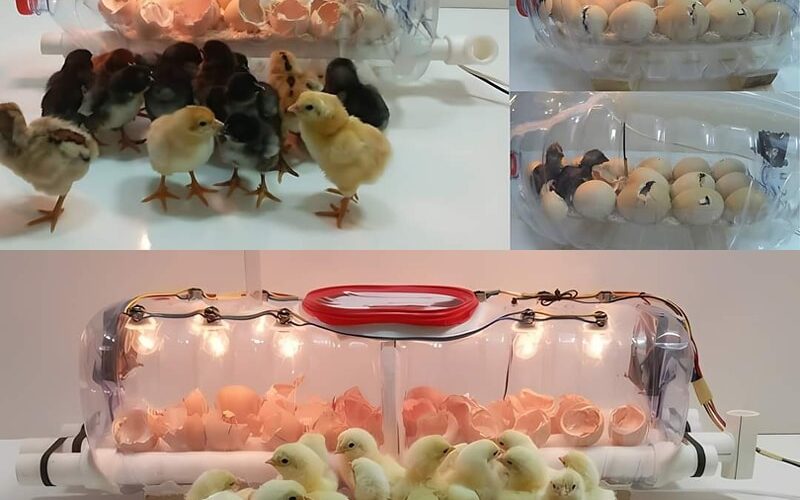
Materials needed:
- A 5 liter (or larger) plastic bottle
- Small light bulbs or heat lamps
- A thermometer and a hygrometer
- Egg carton or foam for stabilization
- Tools for cutting and making holes (e.g. scissors, drill)
Step by step guide:
- Preparing the Bottle:
- Clean the plastic bottle well.
- Place the bottle on its side and cut a large opening on the narrower side. This will act as the door to your incubator.
- Heat source configuration:
- Install small light bulbs or heat lamps on the top or sides of the bottle. Make sure they are secure and evenly distributed for consistent heating.
- The goal is to maintain a constant temperature of approximately 99.5°F (37.5°C).
- Ensure egg stability:
- Place foam or egg carton inside the bottle. This will keep the eggs in place and prevent them from rolling.
- Temperature and humidity monitoring:
- Install a thermometer and hygrometer inside the incubator to closely monitor environmental conditions.
- Try to maintain a humidity level of around 45-55% during incubation and 65-75% for the last three days before hatching.
- Ventilation:
- Make small holes for ventilation. This ensures a constant flow of fresh air and helps control humidity.
- Manual Egg Turning:
- Turn the eggs manually at least three times a day to ensure uniform development.
Building a homemade incubator from a water bottle is a hands-on and educational experience. By carefully monitoring and adjusting the conditions inside your incubator, you will be able to successfully hatch eggs and witness the miracle of life firsthand.
Security advice:
- Always monitor heat sources to avoid overheating.
- Keep the incubator out of the reach of small children and pets.
Share this article with your friends and enjoy the adventure of incubating eggs at home!