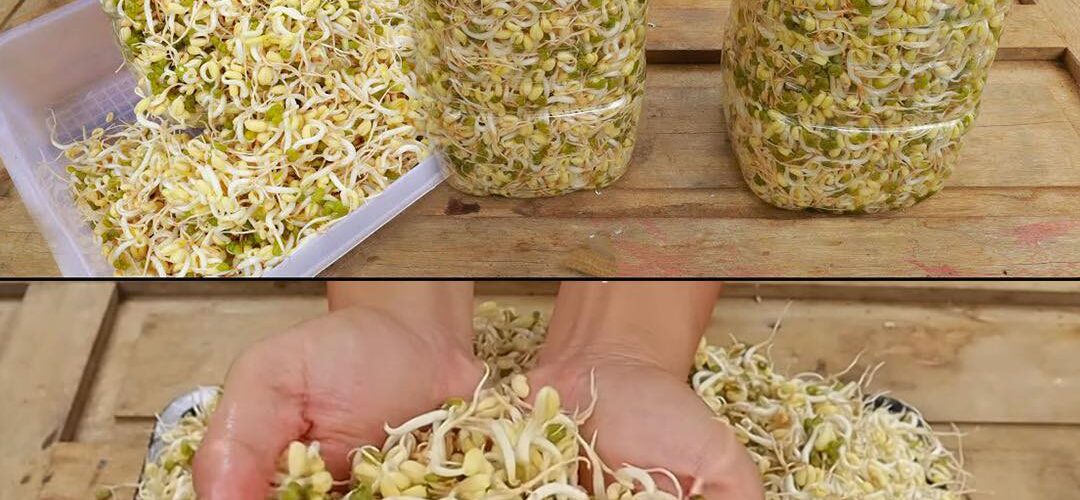
Bean sprouts are a versatile and nutritious addition to your culinary repertoire. They are common in salads, stir-fries and sandwiches, and provide a crunchy and healthy flavor. Although they can be easily purchased at the supermarket, growing bean sprouts at home from plastic bottles is an affordable and satisfying way to ensure a fresh supply of these nutritious vegetables.
Materials you will need:
- Green beans (mung beans are ideal for sprouting).
- Hot water
- Three large plastic bottles (at least 5 liters each).
- A smaller bottle to facilitate the distribution of the seeds.
- A drill or sharp object to make holes in bottle caps.
- Towels
- A knife or scissors to cut the bottles.
Step by step guide:
1. Prepare the beans:
Start by taking a bowl and placing the green beans in it. Make sure you have cleaned and rinsed them well. Next, add warm water to the bowl, covering the beans completely. Mix them gently so that they are well moistened. Let them soak for about four hours. This soaking period helps start the germination process by hydrating the beans.
2. Preparation of the bottle:
While the beans are soaking, you can prepare the large plastic bottles. You will need to poke holes in the bottle caps to facilitate proper aeration. Use a drill or sharp object to make small holes in the lids. These holes will allow air circulation, essential for the growth of the sprouts.
3. Spread the beans:
Once the beans have soaked long enough, take a smaller bottle and cut off the top to create a funnel. This funnel will make it easier to transfer the beans to the large jars. Gently pour the soaked beans into the large jars, distributing them evenly across the three containers.
4. Cover with hats and towels:
After evenly distributing the beans, place the caps on the large jars. To ensure the sprouts remain in a dark, humid environment, cover the jars with towels. Ideally, these towels should be kept slightly damp. You can achieve this by lightly spraying them with water.
5. Irrigation and drainage:
For the next four days, you will have to take care of your sprouts. Water the beans three times a day, making sure they receive enough moisture to grow healthy. Water each session for about five minutes. After each watering, replace the lids on the jars and place them upside down. This way, excess water will drain and the sprouts will not become waterlogged. Remember to re-cover the bottles with towels after each session to maintain the desired darkness.
6. Harvest your sprouts:
After four days of careful cultivation, the plastic jars will be filled with plump white bean sprouts. To harvest them, you will have to open the bottles. Be careful in this step so as not to damage the delicate buds. Once you’ve removed the sprouts from the jars, rinse them well before adding them to your favorite dishes.
Growing bean sprouts at home from plastic bottles is a simple and rewarding process. By following these simple steps, you’ll be able to enjoy a fresh supply of nutrient-packed sprouts in just a few days. With their crunchy texture and nutritional value, home-grown bean sprouts are sure to enhance your culinary creations and give you a satisfying feeling of accomplishment. Happy germination!